

Django in Google's Project IDX
How to Leverage Django in Google's Project IDX: A Revolutionary IDE for Developers


Google's Project IDX presents a groundbreaking integrated development environment (IDE) empowered with AI programming assistants and versatile template support. In this detailed guide, we'll navigate through the setup and execution of a Django project in IDX, enabling developers to harness the full potential of Django development seamlessly within this innovative workspace.
Introduction to Project IDX
Project IDX stands as a promising alternative to traditional IDEs such as Microsoft's Visual Studio Code (VSCode). With AI programming assistants like PaLM 2 and Codey, IDX delivers intelligent support throughout the coding process, including code completion and suggestion. While VSCode boasts an extensive plugin ecosystem, IDX's AI-backed features have the potential to automate and elevate development processes significantly.
Getting Started with Project IDX
Join the Waitlist for Project IDX: As Project IDX is currently in beta, join the waitlist here to gain access. Upon joining the waitlist, patiently await confirmation to explore this cutting-edge workspace.
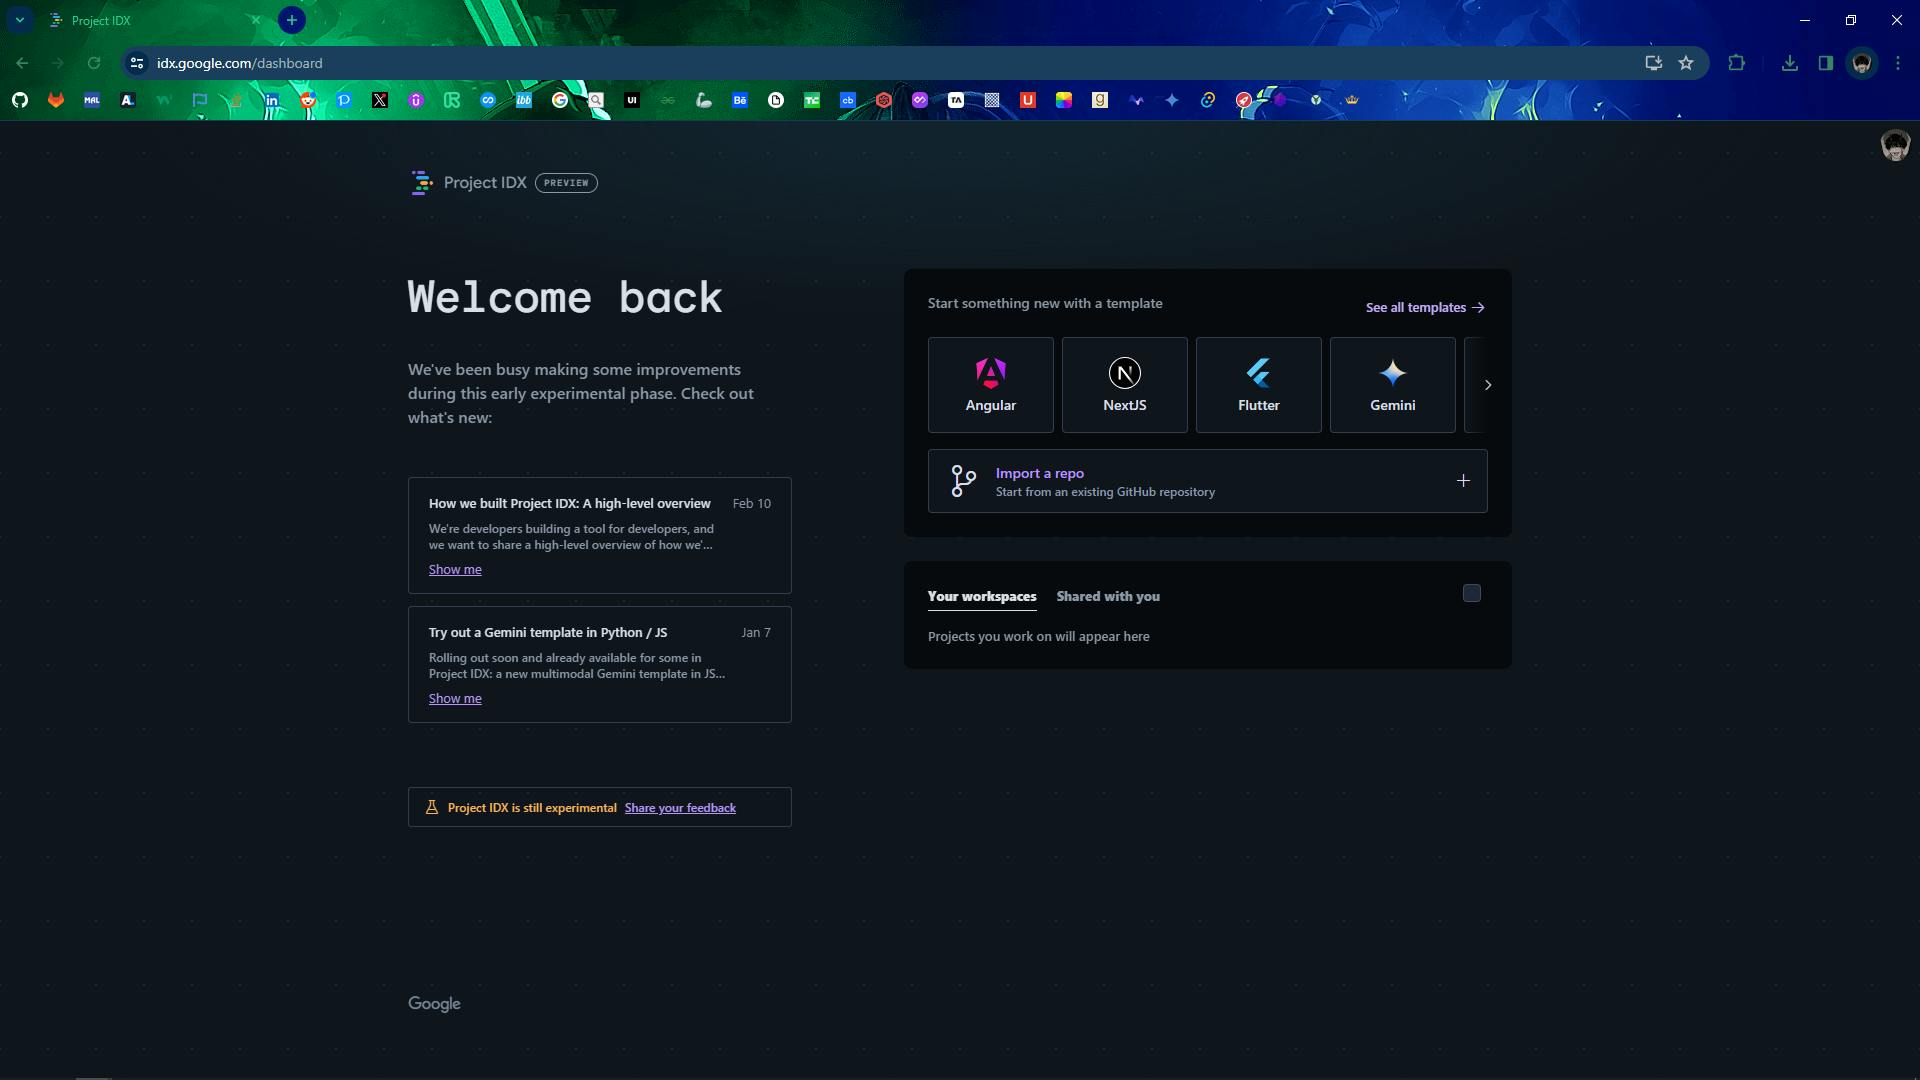
Navigating to the IDX Dashboard: Upon gaining access to Project IDX, log in and navigate to the IDX dashboard. From here, explore the various templates and functionalities IDX offers.
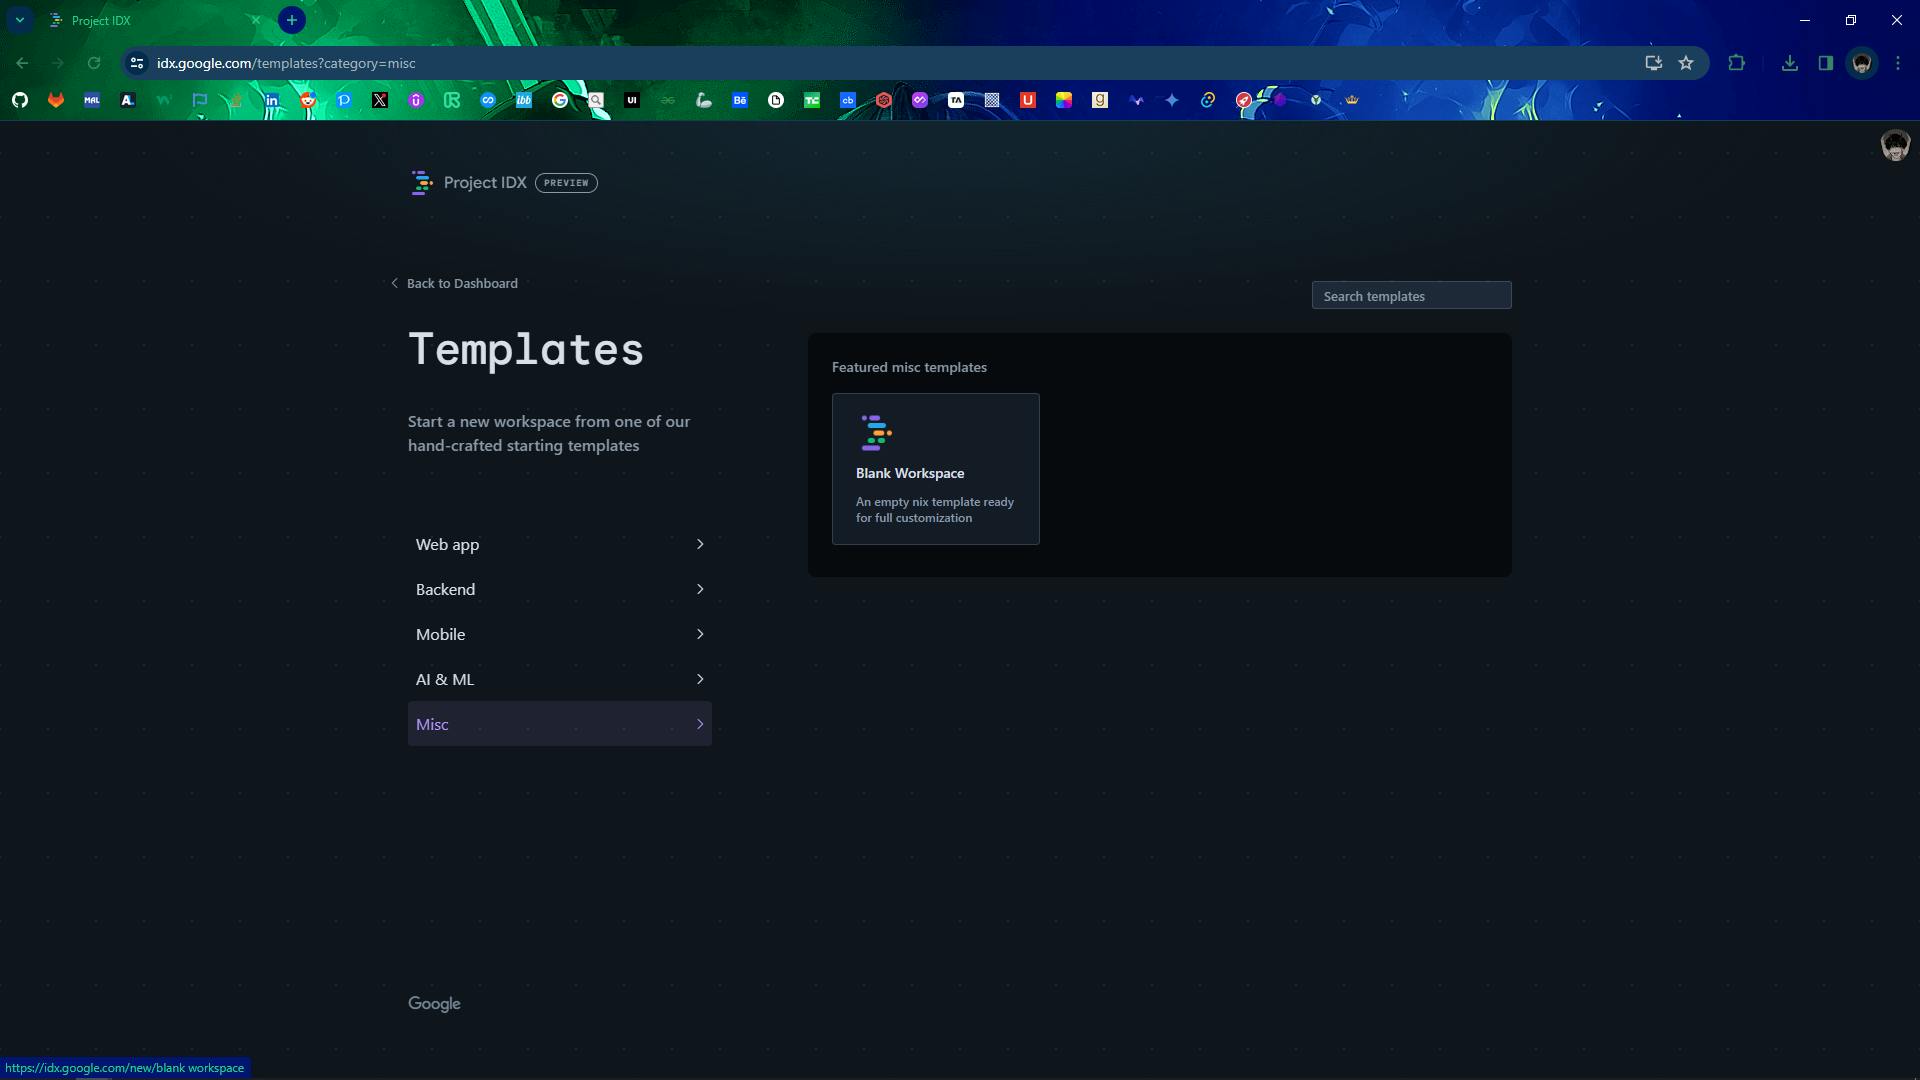
Selecting the "Blank Workspace" Template: Within the dashboard, opt for the "Blank Workspace" template to initiate your Django project from scratch. This template provides a clean slate for your development journey.
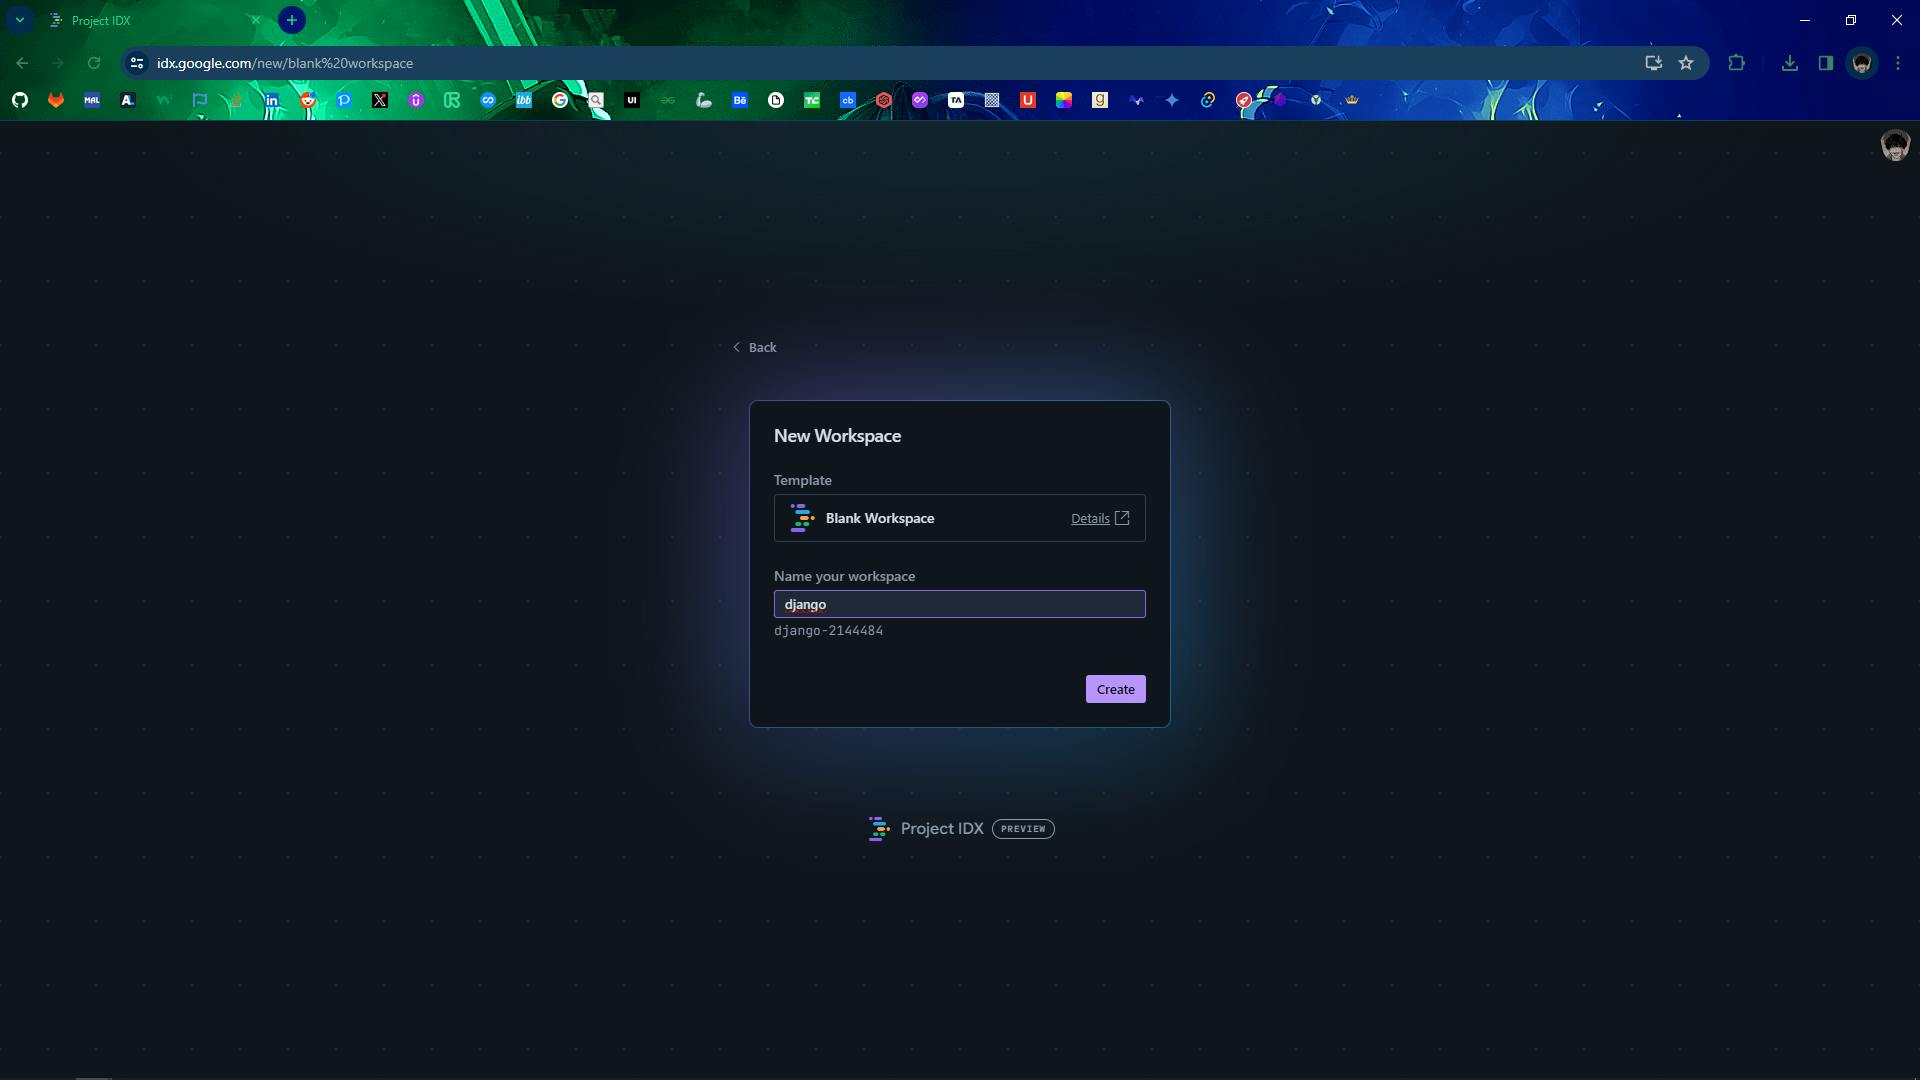
Creating a Workspace: Assign a name to your workspace, such as "django," and proceed to create it. This step initializes the environment for your Django project within IDX.
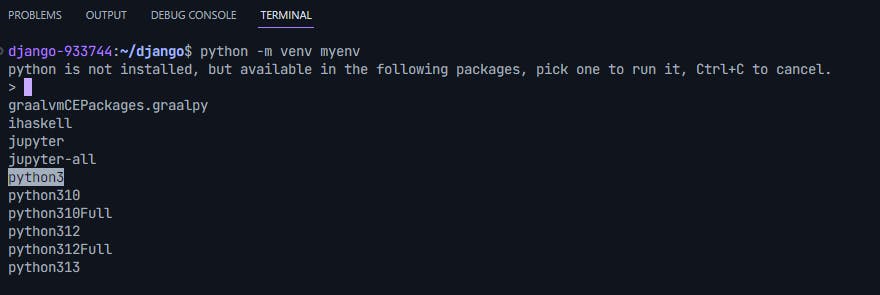
Setting Up a Virtual Environment (Optional): Open the terminal within IDX and consider creating a virtual environment for your project using the following command:
python -m venv myenvIf prompted to choose a Python interpreter, select Python 3
Activating the Virtual Environment: Activate the virtual environment using the following command:
source myenv/bin/activateInstall Django : Install django in our virtual environment or workspace
pip install djangoCreating a Django Project: Utilize the following command to initiate a new Django project:
django-admin startproject django_projectNavigate into the project directory:
cd django_projectRunning the Django Server: Launch the Django development server to preview your project locally:
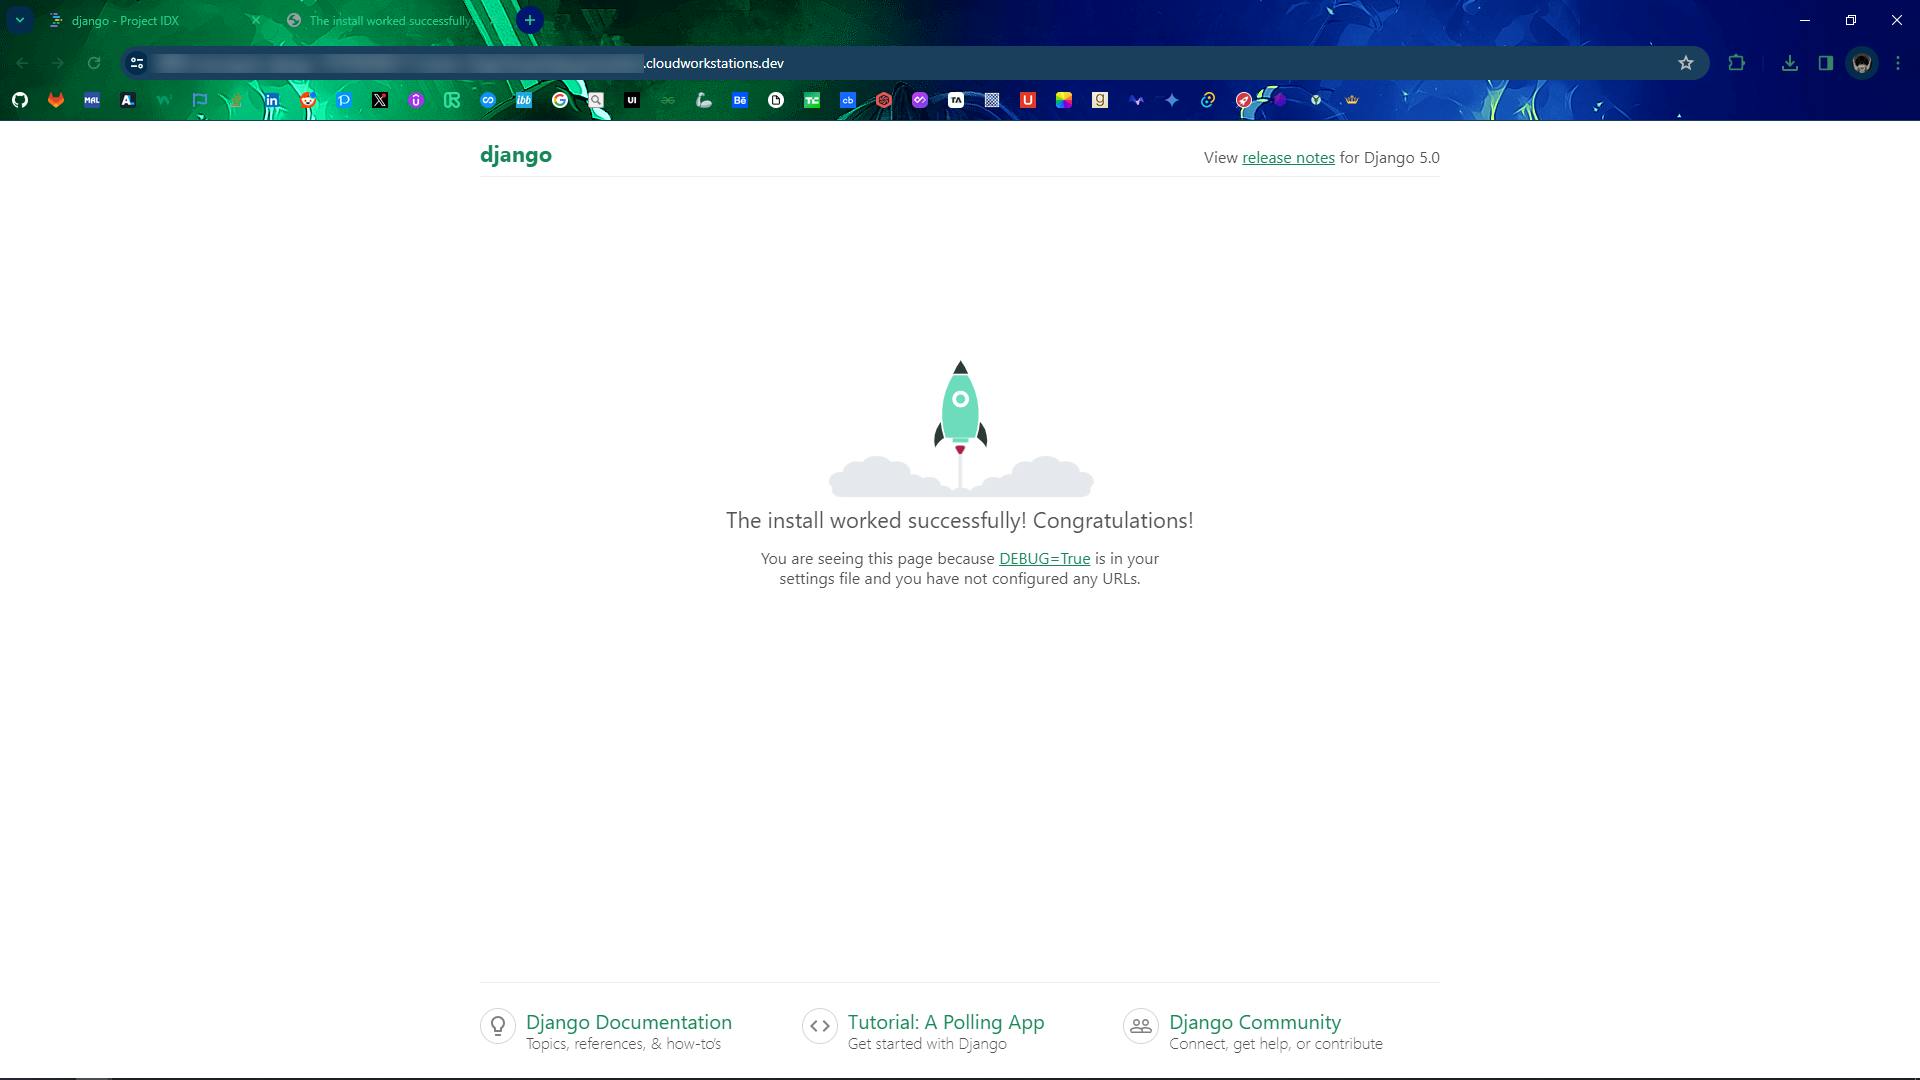
python manage.py runserver
Access the live server by clicking the Follow link that appears while hovering/clicking on the localhost server link. This allows you to interact with your Django application in real-time, facilitating testing and debugging processes.
With IDX, the development of Django projects is streamlined and efficient. This guide equips developers with the knowledge to seamlessly integrate Django development within the IDX environment, maximizing productivity and innovation.
Thank you for embarking on this exploration of Django in Google's Project IDX!